
How to Add Google Reviews to a Website
How credible do you appear to potential clients? One powerful way that you can build trust with your virtual visitors (in minutes!) is by displaying your Google reviews directly on your website. In this guide, we’ll walk you through how to add Google reviews to your website, step-by-step.
Key Takeaways
- Credibility Boost: Displaying Google reviews on your website enhances credibility, building trust with potential customers.
- Easy Integration: Utilize WordPress plugins for hassle-free integration on your website.
- Widget Solutions: If not on WordPress, platforms like SociableKIT and Elfsight offer user-friendly widgets for embedding Google reviews.
- Advanced Options: Businesses with technical resources can take advantage of Google Business Profile API for more control over the review display.
Generate 5-star Google reviews for your business automatically
Why You Should Add Google Reviews to Your Website
Before diving into the how-to, let’s explore why it’s worth the effort to showcase your Google reviews on your website. Authentic customer feedback acts as a virtual word-of-mouth recommendation, helping you boost your public image. When visitors see positive reviews from real customers, they’re more likely to trust your business and consider making a purchase with you over a competitor.
Use a WordPress Plugin
For those using WordPress, adding Google reviews is a breeze with dedicated plugins. Check out options like the Widget Google Reviews plugin or the WP Plugin for Google Reviews. These plugins seamlessly integrate your Google reviews into your WordPress site, allowing you to display genuine customer feedback—no coding required.
Steps for Installing Plugin for Google Reviews by Trustindex.io
1. Install the plugin by selecting the “Plugin” tab from the options found in the WordPress menu and clicking “Add New.”
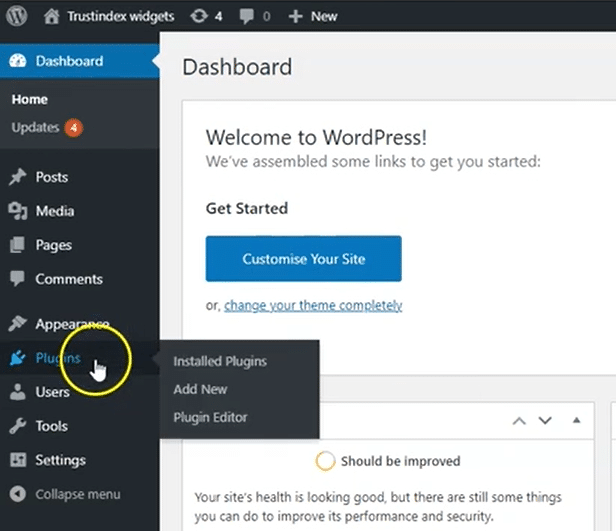
(source: WordPress)
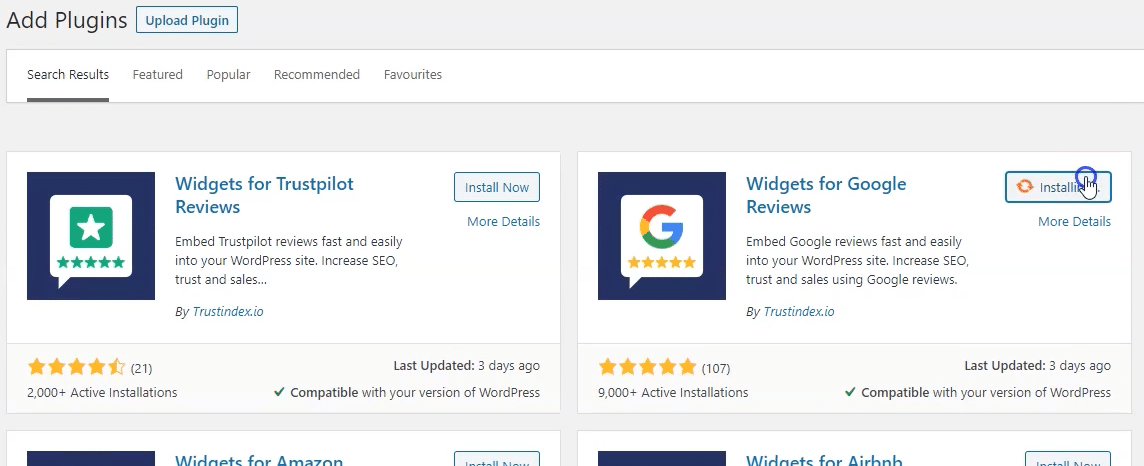
2. Type in the name of the plugin in the search bar. Once found, click “Install Now” to download.
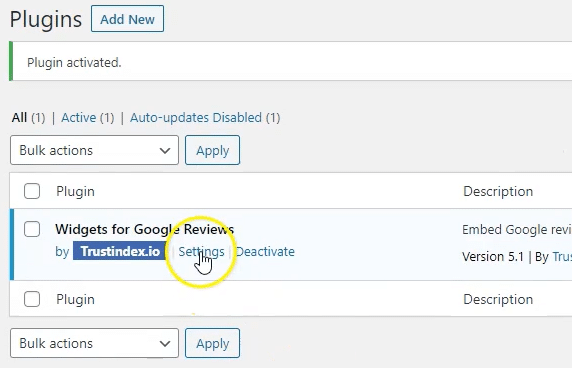
3. Once the plugin is activated, navigate to the plugin and click “Settings.”
4. Copy and paste your business’s Place ID or the Google Search/Maps URL of the business listing and click “Check” to search for the right location.
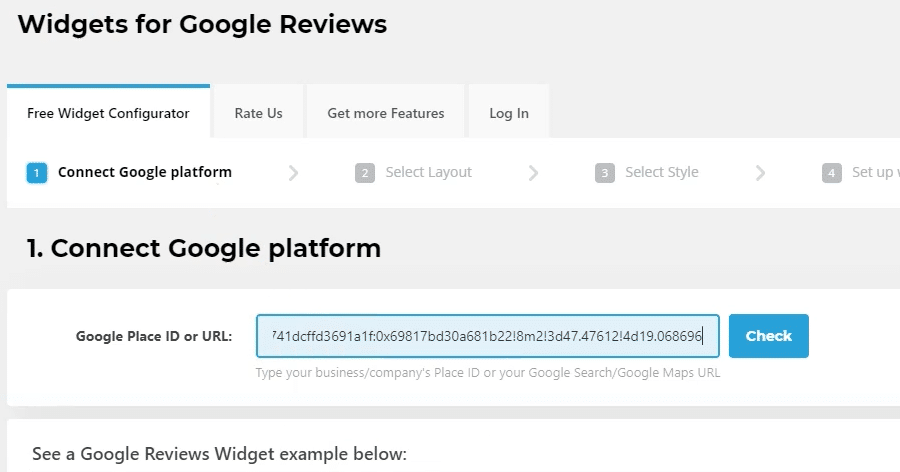
5. Once you locate the correct listing, hit “Connect.”

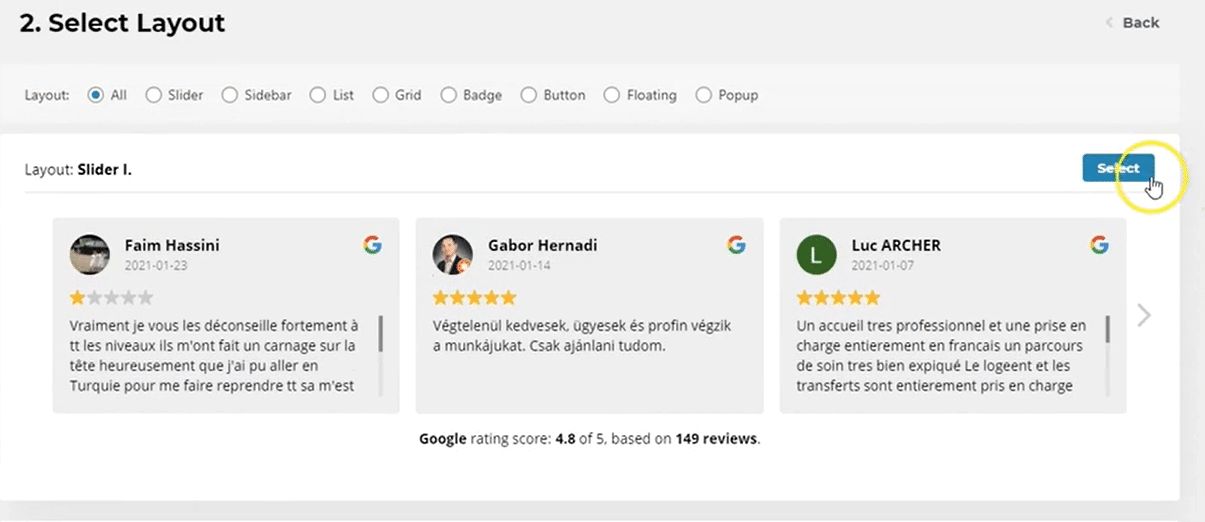
6. From there, you will browse your layout options. Once you find one you like, hit “Select” on the far right.
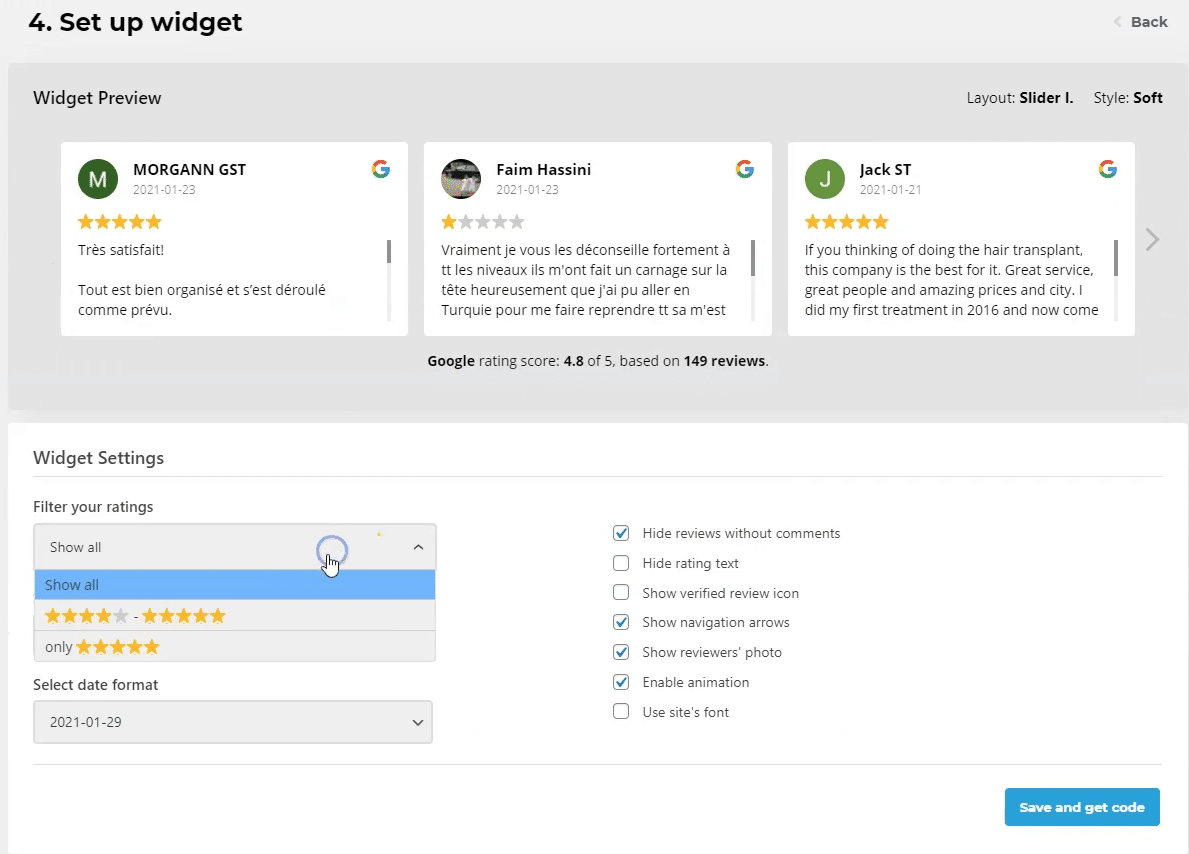
7. Adjust your review settings to your liking. Once finished, click “Save and get code” in the bottom right of your screen.
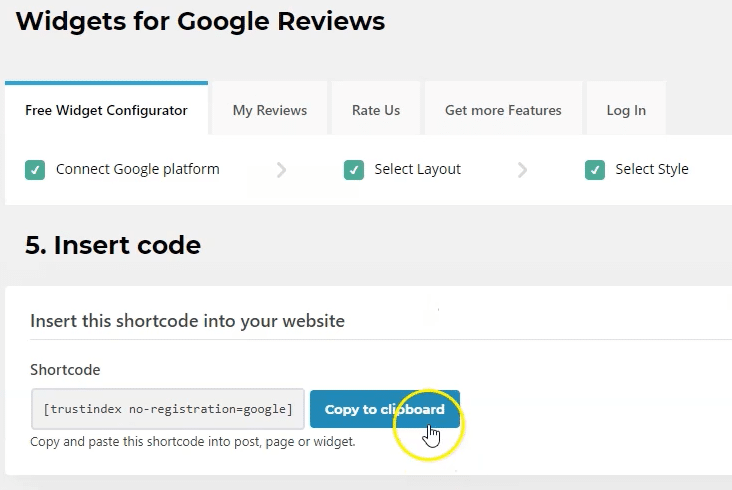
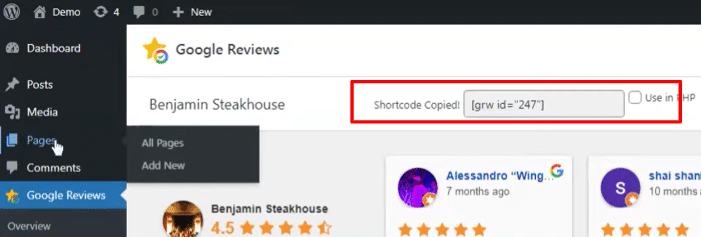
8. A shortcode will appear that you can copy and embed on your website. This code will tell WordPress to add Google reviews to your website.
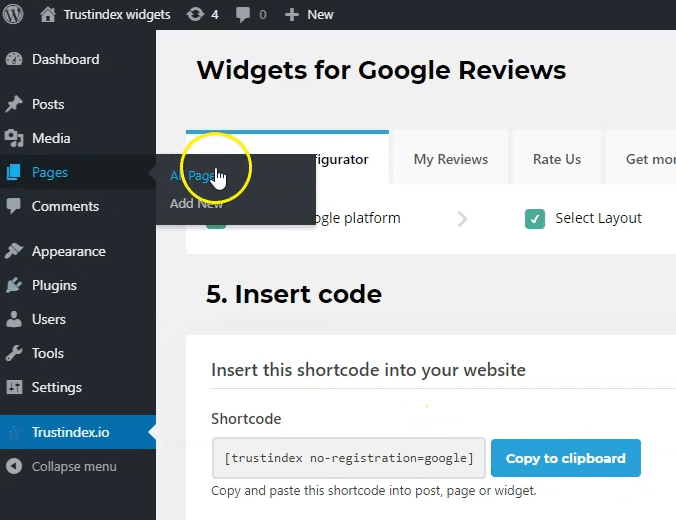
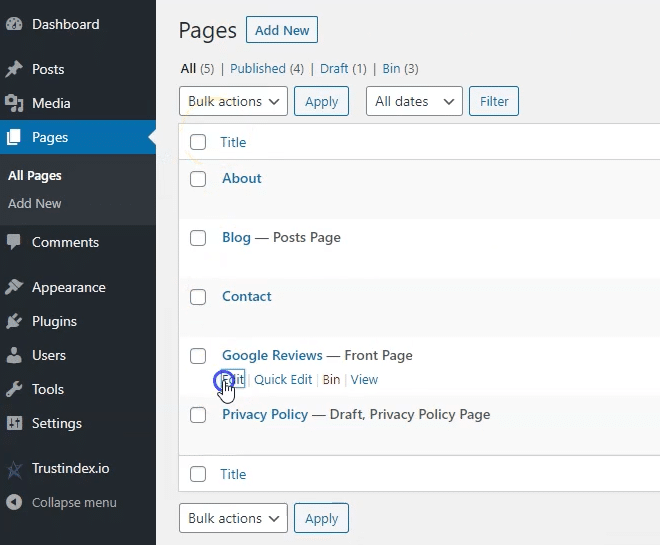
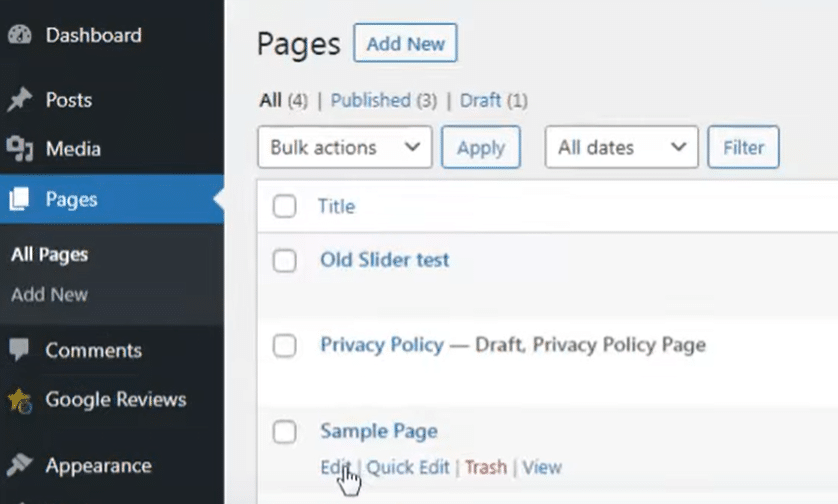
9. Navigate to the “Pages” tab and hit “All Pages.”
10. From there you can insert the shortcode into your desired page by clicking “Edit.”
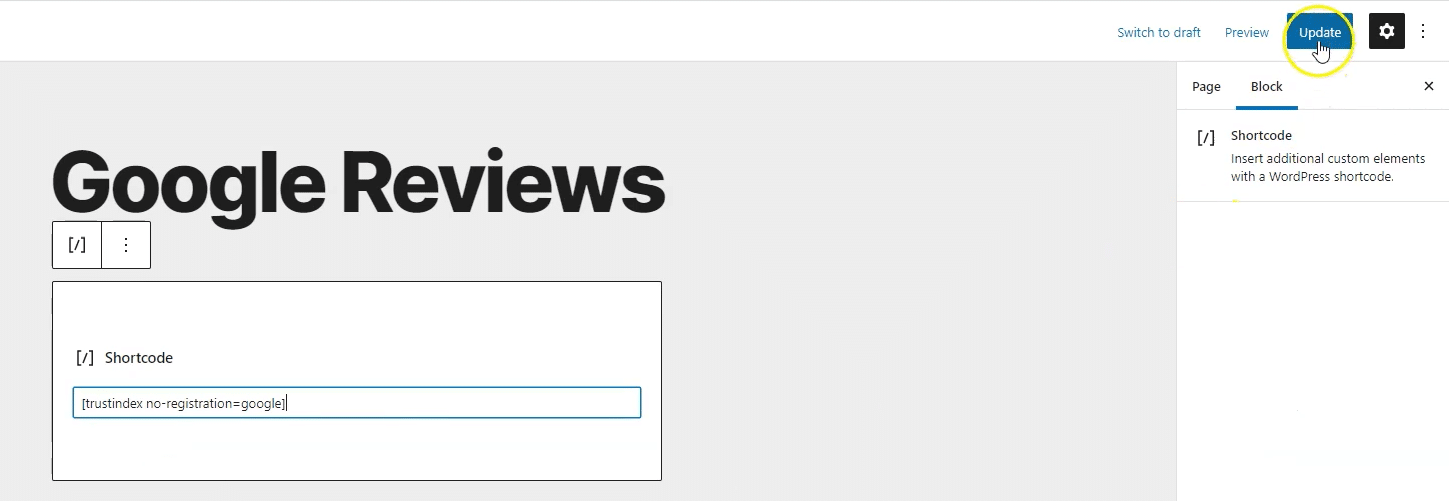
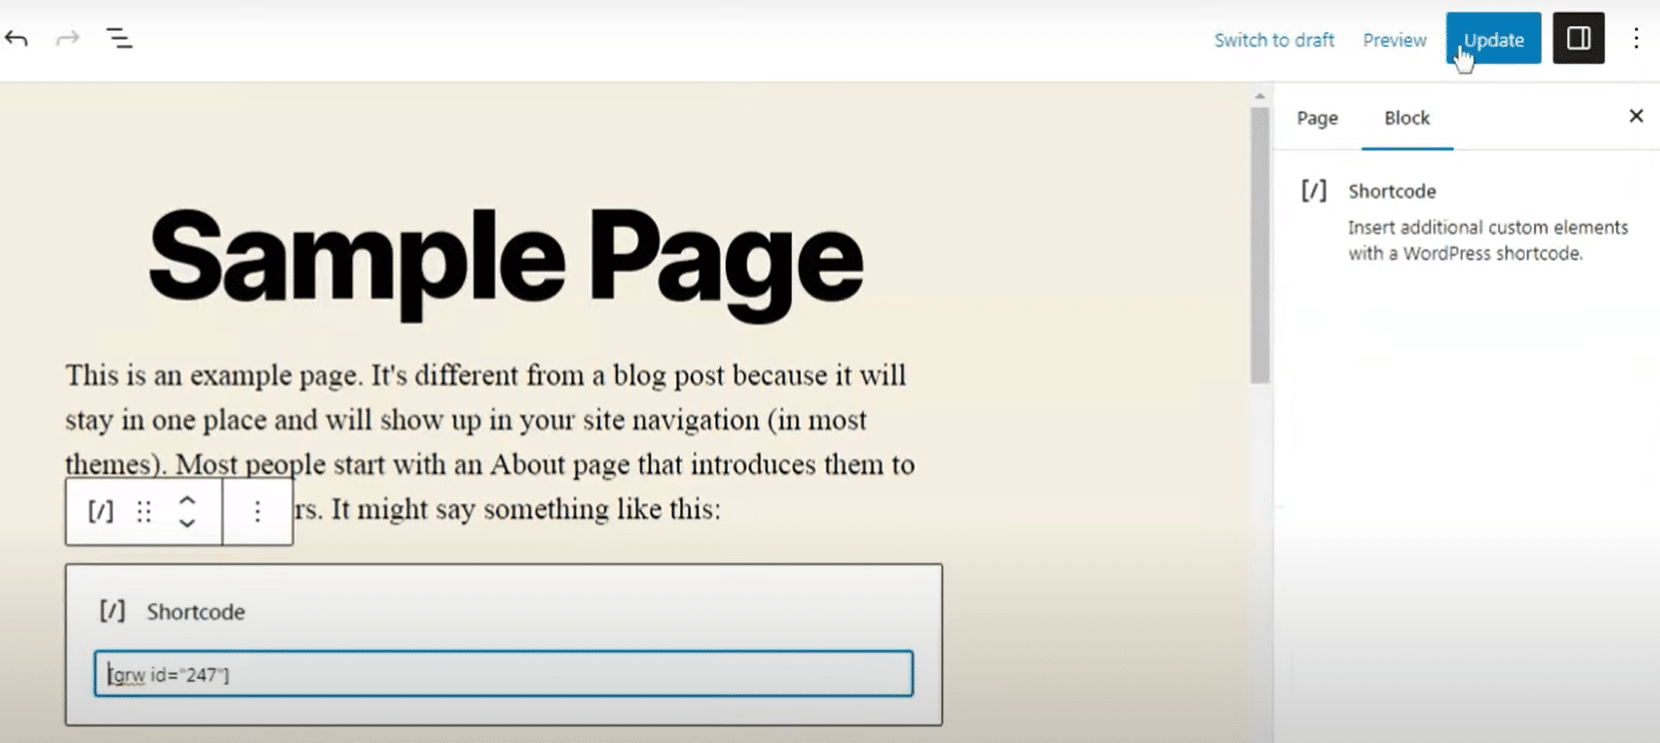
11. Once on the page, right-click and paste the shortcode. A box containing the text will automatically appear. Once you are sure the shortcode is correct, navigate to the top right and hit “Update.”
12. A notification will appear in the bottom left corner. You can click “View Page” to see your updated changes.

Steps for Installing Widgets for Google Reviews by RichPlugins
1. Follow steps 1 and 2 of the first guide to help you search, download, install, and activate the plugin from the WordPress plugin directory.
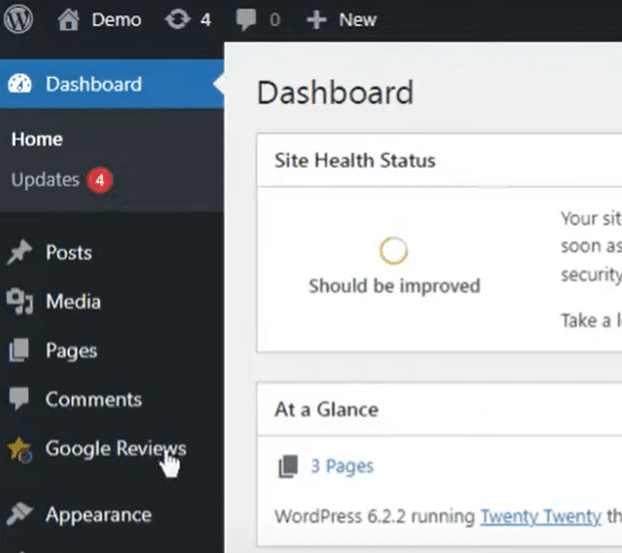
2. Once successfully activated, navigate to and click the “Google Reviews” tab.
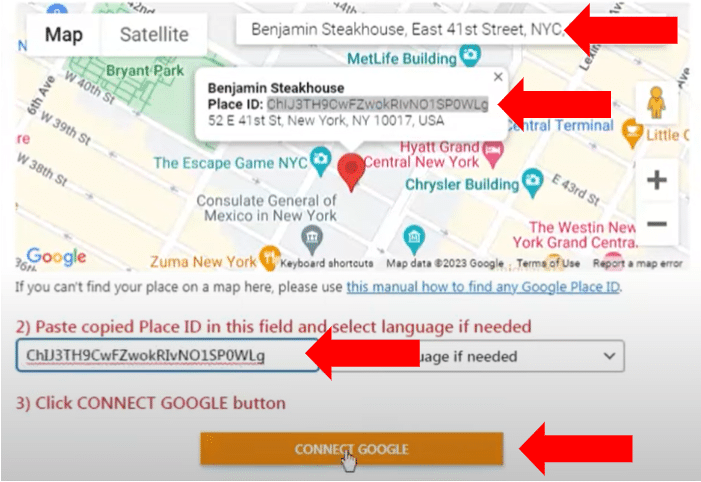
3. A window will appear. Search for your business by looking up the name in the provided search bar. Copy the Place ID code and paste it into the box below the map. Once pasted, click “Connect Google.”
4. Copy the shortcode that appears, then navigate to the “Pages” tab and click “All Pages.”
5. Find the page you would like to add the widget to and click “Edit.”
6. Determine where you would like the review plugin to live—such as at the top or bottom of the page. Right-click and hit “Paste” to embed its shortcode. Once you are sure the information is correct, click “Update” in the top right corner.
7. A small notification will appear in the bottom left corner of your screen. Click “View Page” to review your updated page.

Google Review Widgets
If you’re not using a WordPress website, don’t worry; other options are available. Platforms like SociableKIT and Elfsight offer user-friendly widgets that allow you to add Google reviews quickly and easily. With a range of customization options, these widgets allow you to adjust their appearance to fit cohesively with your website’s design.
Use the Google Business Profile API (Hard Mode)
For those seeking a more advanced approach, integrating Google reviews via the Google Business Profile API is an option you can explore. While this requires a little more technical know-how than the other options, it offers you more control over how reviews are displayed—and that might be just enough to land you more customers.
You’ll need to follow a few specific steps, including creating a Google API project, obtaining OAuth 2.0 credentials, and using the API to import review data, just to name a few. This method is ideal for local businesses with more complex requirements and the resources to hire a web developer. Here’s what you need to do:
Prerequisites
Before you can begin, you will need to check with Google to see what prerequisites are required. Here is a brief summary of the main things you will need:
- Get a Google account
- Try out Business Profile
- Create a project in the Google API console
- Request access to the API
Basic Setup
Follow Google’s basic setup guide to enable an API and obtain the OAuth 2.0 credentials.
Import Review Data
Once you have completed the basic setup, you can choose how to pull in review data to showcase on your website. Utilizing a specific API, you can choose how the data for your listing is displayed. We have listed a few that you can use to get started:
Once you have imported the review data, lean on the experience of a developer to help you add the reviews to your website.
How Broadly Can Help with Online Reputation Management
Navigating the world of online reputation management can be overwhelming—that’s where Broadly can help. With our team of experts and easy-to-use app, you can effortlessly manage and showcase your Google reviews, streamlining the process of collecting, responding to, and displaying feedback on your website. Elevate your online presence and build trust with potential customers while focusing on what you do best—running your business.
Adding Google reviews to your website is a strategic move that can significantly increase your bottom line. Whether you choose a simple plugin, a user-friendly widget, or a more advanced API integration, showcasing authentic customer feedback is a surefire way to stand out. Consider your business’s needs and resources to determine the best approach for you, and remember, Broadly is here to simplify the process and help you shine online.